If you want to send products to an Amazon warehouse in the UAE, you need to follow the correct FBA shipment process, including labeling, packaging, and shipment creation inside Seller Central. Mistakes at this stage can delay or reject your inventory.
I have been a brand owner on Amazon UAE and Noon UAE for 4 years. In this Amazon FBA UAE shipping guide, I will show you the exact steps to prepare, label, pack, and send your inventory to the Amazon warehouse without delays or rejection.
What Is Amazon FBA in UAE and How It Works
FBA stands for Fulfilled by Amazon. When you use FBA, you send your products to Amazon's fulfillment center in the UAE, and Amazon handles everything after that — storage, picking, packing, shipping to the customer, and even customer returns. Your products also become eligible for Amazon Prime delivery, which significantly boosts your visibility and conversion rate.
The alternative is FBM — Fulfilled by Merchant — where you store and ship products yourself. For new sellers testing a product, FBM makes sense initially. But once you've confirmed demand, FBA is the growth path. UAE customers expect fast delivery, and Amazon Prime gives you that edge without you managing logistics yourself.
Before Sending Products to Amazon Warehouse: Listing Requirements
Before creating a shipment, your product listing must already be active and live on Amazon.ae. You cannot create an FBA shipment for a product that doesn't have an active listing. If your listing is still incomplete or in draft, finish it first. Every product in your shipment needs an ASIN — Amazon's unique product identifier — and that only exists once the listing is published.
Important: Double check that your listing status shows 'Active' in Seller Central → Manage Inventory before moving to Step 2. If it shows 'Inactive' or 'Suppressed', fix the listing issue first.
How to Create an Amazon FBA Shipment Plan in Seller Central
This is where the process officially begins inside Seller Central. Here is how to do it step by step:
Go To Main Menu
In Seller Central, go to the main menu and click Inventory → FBA Inventory. Find the product you want to send, then on the right side of the listing click the dropdown menu → select Send/Replenish Inventory. From here, follow the on-screen steps to complete the shipment creation process.
Set Your Ship From Address
Enter the address where your stock is currently located — your home, your office, or your supplier's address. This is where Amazon's courier will collect from, or the address you will ship from. Make sure this address is accurate and complete including the emirate and postal code.
Enter Your Quantities
Enter how many units of each product you are sending. Be accurate here — if the quantity you declare does not match what Amazon receives at the warehouse, it creates a discrepancy that can delay your inventory going live. Count your stock carefully before entering numbers.
How to Print Product Labels?
Once you have entered your product quantity and the number of boxes that will carry your inventory, the Print SKU Labels button will become highlighted and clickable. Click on it and a window will appear where you enter exactly how many labels you need to print — one label per unit. Print them directly and stick each label onto its product using clear tape, making sure the label lies flat and is fully secured.
Alternatively — and this is the method many experienced sellers prefer — print just one label from Seller Central, then take that printed label to any printing shop and ask them to print the full quantity on a large sticker sheet. This gives you professional peel-and-stick labels that are much faster to apply than cutting and taping individual prints. Both methods work perfectly fine — choose whichever suits your quantity and workflow best.

Amazon Assigns Your Fulfillment Center
Amazon's system will automatically assign your shipment to a fulfillment center in the UAE. You do not get to choose which center — Amazon decides based on your product category and available space. Accept the assignment and move to the next step.
Print Your Box Labels
Once Amazon assigns your fulfillment center, the next step is to print your box labels. Based on the number of boxes you declared in your shipment plan, Seller Central will generate exactly that many box labels. Print one label per box and stick it clearly on the outside of each box. These labels tell Amazon which shipment each box belongs to and allow their warehouse team to process your delivery correctly. Do not skip this step — boxes arriving without labels will not be accepted.
Quick tip: Print all your box labels at the same time as your product labels in one session. That way everything is ready before you start packing and you avoid missing any boxes at the last minute.
Choose Your Shipping Method
Amazon UAE gives you two options for getting your stock to the fulfillment center:
- Amazon Partnered Carrier — Amazon arranges the courier, charges you for shipping, and the cost is deducted from your seller account. This is the easiest option for most new sellers.
- Non-Amazon Carrier — you arrange your own courier. Use this if you have a cheaper shipping option, but make sure your courier delivers to Amazon fulfillment centers and follows all their receiving requirements.
Book Your Appointment
After selecting your shipping method, click 'Go To Shipping Queue' at the bottom of the page. Once the Shipping Queue loads, refresh the screen after 3 to 4 minutes — your shipment name will appear in the list. Click on the 'Book Appointment' tab and a small calendar window will appear showing all available dates at the fulfillment center.
When choosing your appointment date, select a date at least 2 days ahead of when you are booking. This gives you enough time to complete all preparation — packing your products, applying FNSKU labels on each unit, labelling your boxes, and arranging the courier pickup or delivery. Rushing this process is one of the most common reasons shipments arrive incomplete or incorrectly packed. Give yourself the time to do it properly.
Amazon UAE Packaging and Labeling Requirements for FBA
This is where many first-time FBA sellers get their shipments rejected or delayed. Amazon has strict packaging requirements and they are not flexible. Follow these rules exactly before you pack a single box.
Individual Product Packaging
- Every product must be packaged so it can survive the fulfillment process — picking, packing, and shipping — without damage
- Loose products or products with multiple pieces must be contained so nothing falls out during handling
- Products with sharp edges, liquids, or fragile items have specific additional requirements — check Amazon's category-specific packaging guidelines in Seller Central
- If your product could be confused with another product, it must be in packaging that clearly identifies it
Poly Bag Requirements
If your product requires a poly bag (clear plastic bag), Amazon has specific rules:
- Poly bags must be at least 1.5 mil thick
- Any poly bag with an opening of 5 inches or larger must have a suffocation warning printed or attached
- The barcode on the product must be scannable through the poly bag, or you must label the outside of the bag
Carton / Box Requirements
- Use strong, six-sided boxes — no broken, crushed, or previously used boxes that have lost structural integrity
- Use proper cushioning material inside the box — bubble wrap, air pillows, or paper — to prevent movement during transit
Amazon Warehouse Delivery Requirements in UAE
On the day you deliver your products to the Amazon UAE warehouse, you must arrive fully prepared. Missing any of these requirements can result in your delivery being refused at the gate. Here is what you must have ready:
- Products and Cartons Labelled Correctly
Every individual product unit must have its FNSKU label applied, fully covering the original manufacturer barcode. Every carton must have its box label printed from Seller Central and stuck clearly on the outside. Amazon's receiving team will scan both — if any label is missing, damaged, or unreadable, that unit or box will be set aside and not processed until corrected. - Delivery Invoice — A Required Document
You must prepare a Delivery Invoice document in MS Word before arriving at the warehouse. This is a simple document but it is mandatory. Without it, Amazon's receiving team may not accept your delivery. The Delivery Invoice should include: your business name, your Amazon Seller ID, the shipment ID from Seller Central, the list of products in the shipment with their ASINs and quantities, the total number of boxes, and the date of delivery. - Shipment Print — Bring 2 Copies
Print your shipment confirmation from Seller Central and bring at least 2 copies with you. One copy will be handed to the Amazon receiving team and one you keep for your own records. Security at the gate will ask to see this document before allowing you entry — do not arrive without it. - Safety Vest — Green Color (Mandatory)
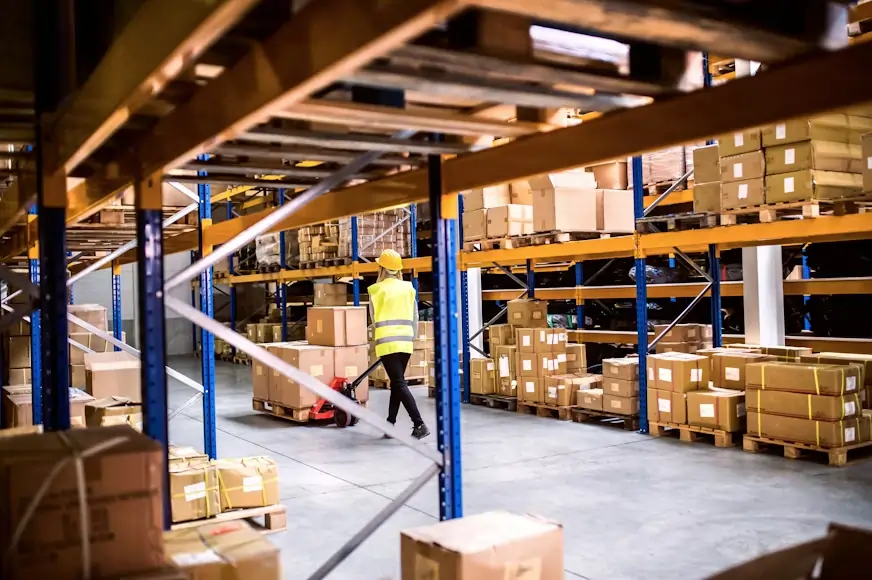
A green safety vest is mandatory before you can enter the Amazon warehouse gate. This is a standard safety requirement at all Amazon fulfillment centers in the UAE. You can purchase one from any hardware or safety equipment store — it is inexpensive and widely available. Buy it once and keep it in your car so it is always with you for every future delivery. - Safety Shoes — Mandatory for Entry
Along with the safety vest, closed-toe safety shoes are required before entering the warehouse. Sandals, slippers, or regular trainers are not accepted. Purchase a proper pair of safety shoes once — they will last through all your future shipments and the one-time cost is well worth it. You will not be allowed past the entry gate without them, no exceptions. - Documents Security Check at the Gate
Before you are allowed through the entry gate, security will check your documents. Have your Delivery Invoice and Shipment Printout ready and easily accessible — do not have them buried at the bottom of a bag. Security will verify your documents, check your appointment booking, and confirm you are wearing your safety vest and shoes. Only once everything checks out will you be directed to the receiving bay.

Important reminder: Every single time you visit the Amazon warehouse for a delivery — vest, safety shoes, delivery invoice, and shipment printout. No exceptions. Missing any one of these will turn you away at the gate and waste your entire trip.
What Happens After Your Shipment Reaches Amazon Warehouse
Once your shipment arrives at the fulfillment center, Amazon begins the receiving process. Here is what to expect:
- Receiving time — Amazon typically takes 3 to 7 business days to fully receive and process a shipment. During peak periods like Ramadan or major sale events, this can take longer.
- Your inventory becomes 'Active' — once received, your units will show as available inventory in Seller Central and your listing will show the in-stock quantity to customers.
- Shipment reconciliation — Amazon will confirm whether the quantity they received matches what you declared. If there is a discrepancy, they will notify you. Small discrepancies are common and usually resolved automatically.
- Storage fees begin — from the moment Amazon receives your inventory, storage fees start accumulating. This is why it is important to send stock you are confident will sell, not excess inventory that will sit for months.
Watch this closely: Check your shipment status in Seller Central every day after dispatch. If a shipment shows 'Receiving' for more than 10 business days, contact Amazon Seller Support — sometimes shipments get stuck in the system and need a manual check.
Common Amazon FBA Shipment Mistakes to Avoid
In 4 years of sending FBA shipments, here are the mistakes I see new sellers make repeatedly — and that you can avoid completely:
- Missing FNSKU labels — the most common reason for shipment rejection. Label every single unit before it leaves your hands.
- Original barcode not covered — if the manufacturer barcode is still visible alongside the FNSKU, Amazon's scanner picks up the wrong code. Cover it completely.
- No carton labels — shipping boxes without the printed carton labels from Seller Central. Amazon cannot process unidentified boxes.
- Wrong quantities declared — entering 50 units in the shipment plan but only sending 45. Always count before you confirm.
- Damaged packaging — sending products in damaged retail packaging. Amazon can refuse to sell items that look used or damaged even if they are new.
- Sending products not in the shipment plan — every ASIN in your shipment must be included in the shipment plan. You cannot add random products to a box.
Final Thoughts on Sending Products to Amazon Warehouse UAE
Sending your first FBA shipment feels complicated the first time. By your third or fourth shipment, it takes less than 30 minutes from start to finish. The key is getting the process right from the beginning — proper packaging, accurate labelling, and correct quantities declared. One rejected shipment early on is a lesson that costs you time and money. Follow the steps in this guide and you will avoid that entirely.
If you have not yet set up your Amazon UAE seller account, start with our complete guide on How to Start Selling on Amazon UAE. And if your listing is not yet fully optimized, read our Amazon UAE Listing & Optimization Guide before sending your first shipment — a well-optimized listing means your inventory starts selling the moment it hits the warehouse.
— Written by a 4-year Amazon UAE & Noon UAE Brand Owner
Frequently Asked Questions
Real questions from new Amazon UAE sellers about FBA shipments — answered directly.
How much does it cost to send products to the Amazon UAE warehouse?
The cost depends on two things: shipping cost to get your boxes to the fulfillment center, and Amazon FBA fees per unit sold. Shipping cost varies based on your box weight, dimensions, and whether you use Amazon's partnered carrier or your own. Amazon's FBA fees per unit are based on product size and weight — you can calculate these before committing to FBA using our free tool: Open Calculator.
How long does it take for my stock to go live after Amazon receives it?
Typically 3 to 7 business days after Amazon physically receives your shipment. During peak periods like Ramadan, White Friday, or major sale events, it can take up to 14 days. Plan your stock arrivals accordingly — never send a shipment right before a major sale expecting it to be live in time.
Can I send products from my supplier directly to Amazon UAE warehouse?
Yes — this is called a direct-to-Amazon shipment and many brand owners use this to save time and storage costs. Your supplier packs and labels the products according to Amazon's requirements and ships directly to the fulfillment center. The key requirement is that your supplier applies the FNSKU labels correctly before dispatch. You will need to send them the label PDF from Seller Central and verify their packing quality before the first shipment.
What happens if Amazon loses my inventory?
Amazon is responsible for inventory that is lost or damaged while in their fulfillment center. You can file a claim through Seller Central under Reports → Fulfillment → Inventory Adjustments. Amazon typically reimburses you at the product's selling price minus their fees. Keep records of every shipment you send — photos of packed boxes, unit counts, and tracking numbers — as these help with any claims.
How many units should I send in my first FBA shipment?
For your first shipment, send a conservative quantity — enough to test demand without tying up too much cash in storage fees. For most new sellers in the UAE, 20 to 50 units is a sensible first shipment depending on your product size and price point. Once you see the sales velocity, you can calculate the right restocking quantity and lead time to avoid running out of stock.
What is the difference between an FNSKU and an ASIN?
An ASIN is Amazon's public product identifier — it's the same for all sellers offering the same product and appears in the product URL. An FNSKU is Amazon's internal warehouse identifier that is unique to your specific seller account and product. Think of the ASIN as the product's public name and the FNSKU as its warehouse ID badge. Both are important — the ASIN for your listing, the FNSKU for your labels.